Monday, February 27, 2012

Weekend Re-Cap

We found a couch! Ok, it ended up being one that we had seen at Ikea. I started sharing our couch shopping experience here, though it's nothing special; just for me to keep track of.

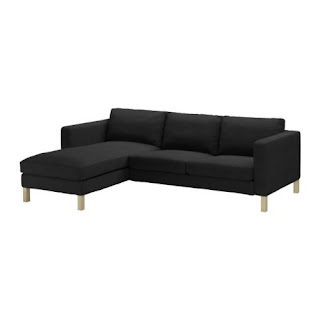
We spent Friday night building it, which was much easier then we anticipated but did take about 2 hours. Most of the time was spent trying to put the slipcover on the cushions. All the cushions has this special none slip coating on the edges, which I love, but dang does that make them hard to put on. Here's the husband on the Ikea Ektorp Love Seat with Chaise Lounge after all his hard work

You can see the corner of our old couch in the background. We pretended to have movie theater seating for a hot minute. Worked well enough, however, we're building a bookcase back there soon.

Saturday I got the day to myself since the husband had a work event. I built a coffee table, put felt covers on the feet, and decoupaged some outlet covers. More on all of that soon. I went to a Arbonne party for a friend that just became a consultant, had her give me her amazing stuffed mushrooms recipe, and learned more about an exciting business venture I'm about to partake in. I also made some amazing rock fish, which, along with the mushrooms, I'll post before too long.


Sunday we moved the brown couch. This was quite a feat. Our staircase leading to the main floor is very narrow, and has a very small turn radius. When we moved into our home we actually rented a scissor lift to lift our furniture up to our deck, to move into the house. The brown couch included. So trying to move the brown couch, without renting another scissor lift was quite eventful. I had the husband, my FIL, my dad, and our friend Franco, show up in the morning. Franco and my dad carried the couch from the living room, through the kitchen, onto the deck. Chris was standing on his dad's utility van, Franco had gone down to stand on a ladder, and Ward next to him. My dad and I pushed the couch over the railing down to Chris, my dad ran down, and we all worked together to lower the couch onto the driveway. Very epic moment, full of me trying not to hyper-ventilate.

We also started cutting and threading pipe for the bookcase, and I made amazing baked broccoli (makes it taste sweeter!) really yummy and moist parmesan crusted pork chops.  Recipes coming this week!

Thursday, February 23, 2012

Sweet and Spicy Beef Kebabs on Brown Rice with Anne's Aioli Sauce

Orange bell peppers, Anne's aioli sauce (which you can't really see...,) sweet and spicy kebabs on brown rice

I think one of our favorite meals are my sweet and spicy beef kebabs. However, both the husband and I prefer the traditional kebab veggie (bell peppers) raw, so we never stick those on our skewers. The husband also doesn't care for onions cooked or raw, so I never bother making those either. Though for a large crowd I think I would. I didn't make these on the grill either, thanks to the weather, but they work just as well in the broiler. Honestly, I think the broiler does a really nice job of caramelizing the brown sugar on these. Also, since I didn't grill, I didn't skewer them, just out of convenience sake.

This entire meal is very simple to make, and the longest part is cooking the brown rice.  It took about an hour in the rice cooker, and once it's finished cooking in the rice cooker, you need to let it sit for another 10 minutes. Brown rice also takes more water then white rice; 3 cups of water to 1 cup of uncooked brown rice. This will make enough rice for 4 to 5 people.

The prep for the kebabs takes about 10 minutes, which includes cutting the sirloin steak, mixing the rub, and rubbing the cubes of steak. Then broil the kebabs for about 10 minutes for medium/ medium well, depending on how large you cut your cubes.


While the kebabs are in the broiler, go ahead and make the aioli sauce. The reason I call it an aioli sauce is because my husband says it taste exactly like all the aioli sauces he's had on sandwiches. However, it's quite different, and much easier then your traditional aioli sauce. Oh, and MUCH healthier. All I do is mix together Greek yogurt, garlic powder, Punjab red tandoori, and very very little cayenne pepper (the husband likes a little kick to it.) It works great as a veggie dip (I'd say add a little more cayenne pepper in it for just veggies) but it also is a great way to cool off these sweet and spicy kebabs. The husband also like to mix it into the brown rice to give the rice some more flavor.

The fact that he likes this so much is astounding to me, because when we first met, and even by the time we started dating, he was very picky with his food, thought ketchup was spicy, would never ever touch sour cream, Greek yogurt, or vegetables. He's come a long way, but is still picky. Especially when it comes to sauces.


Brown Rice (in a rice cooker)
1 cup of brown rice
3 cups of water
Let sit in the rice cooker for about 50 minutes, until the rice cooker says it's ready. Let stand for an additional 10 minutes.


Anne's Aioli Sauce (for 1 to 2 people)
Ingredients:
1TBS Greek yogurt
1/8 tsp of Tandoori spice
1/8 tsp of garlic powder
A tiny shake of cayenne red pepper (if you'd like a bit of a kick)

Mix all the ingredients together in a bowl.


Sweet and Spicy Beef Kebabs
Ingredients:
2lbs sirloin steak cut into cubes
2 pinches sea salt
3 TBS light brown sugar
1 tsp chili powder -Use less for less spicy
1/2 tsp crushed red pepper -Use less for less spicy
1-2 bell peppers (if desired)
Half an onion (if desired)

1. If broiling, turn on broiler. After cutting steak into cubes (or you could use beef stew cubes), mix your seasoning together in a medium sized bowl.
2. Toss in 4-5 cubes into the bowl at a time, and coat them with the rub, using your hands. This will ensure that you don't have excess rub on the steak. Place in a separate bowl/ plate to be skewered later with bell peppers, or place on a broiler safe baking dish.
3. If broiling, broil the kebabs for about 10 minutes for medium/ medium well depending on how big your cubes are. If grilling, make sure you do skewer your kebabs and cook on a medium heat until desired done-ness.


Wednesday, February 22, 2012

Furniture Shopping: Couches, Part One

The husband and I have lived in our home for 1 year and 6 months, almost to the dot. When we first moved in we had a mix of dated hand me down furniture and we very fortunate to be able to buy some new furniture and have our dining room set gifted to us. So it's been a bit of a mis-match, but nothing we couldn't handle, and fairly typical for a young couple. In truth, we were are very blessed for what we do have. Though just like any other couple, we'd like to update some of our older furniture. A lot of it belonged to the husband, he kept his both his desks, which he gave me the one from his childhood bedroom set, we managed to keep his old mattress to put in the guest room, and his childhood bedroom dresser managed to be small enough to fit into our closet. We did end up needing quite a bit more room then that dresser could provide, and we snagged a cheap dresser at a yard sale, which I painted and replaced the hardware on.

Currently we are looking at re-furnishing our living room. It just kind of makes sense since we went ahead an painted and are working on our bookcase. The couch we currently have isn't crazy old, maybe only 5 years or so. However, it has seen better and more comfortable days; I used to fall asleep on this couch all the time. Over time, and over people visiting often, falling in love with this couch, and using it every day, it's lost some of it's comfort, and I think the arms have broken. So it's not just a need of reupholstering it. I also feel like it's really chunky for our living space. I'd love to have something with a bit more of a streamlined look, as well as something where more then 2 people could sit comfortably. You can fit a third person semi-comfortably depending on how much every one likes each other.

Here are some of the couches we've been eyeing at Ikea:

Kivik love seat and chaise lounge- This was comfortable, but low, and the arm rests were a little low as well. I like to rest my arm against rests while I'm typing up blog posts. ;)

Kivik 2 chaise lounges and armchair- not liking that it doesn't have arm rests.


Karlstad love seat and chaise lounge- Comfortable height, but we both wished you could sink into the cushions a little more.

Then we saw this one:

Ektrop love seat and chaise lounge- A little more traditional looking then I had wanted, but I think the grey color gives it a more contemporary feel that we kind of have going in our home. Also, it was the perfect height, the cushions were incredibly comfortable, and  the price isn't so bad.

One of the reasons we're drawn to the chaise lounges is because in all honesty we'd love to get a sectional that reclines. But in a town home, that's not really do-able unless you like the crowded feel. We'll just have to save that for when we buy a single family one day....


Tuesday, February 21, 2012

President's Day Weekend

Did you know the government actually calls Presidents Day, Washington's birthday? They don't include Lincoln's birthday; so technically it's President's Day. Just a discussion my grandmother-in-law and I had.

It was a great, long weekend with the husband. Besides catching up on sleep, which I sorely needed, we managed to make some headway on our custom book shelf. We stained the wood on Saturday, then tried to put the plolyurathane coating on, on Sunday. However, I think the temperature had become to cold for it to properly cure. Monday we found large spots on the wood where the coating had taken, or it shrunk? Not sure, but when we're finished with the entire book case I'll have a detailed post about all of it.


We also decided to have a date night for all of our hard work the last couple of weeks (painting the living room, the bookcase, and me un-cluttering the husband's office.)  We ended up at one of our favorites, Tokyo Japanese Steakhouse. Sadly it doesn't really go with me trying to go gluten free (not to due celiac) since most of their sauces contain gluten, I definitely felt weighed down.

We also celebrated my husband's grandfather's 88th birthday! It was a great time. While the husband and his mom went to go pick up some Dixie Bones BBQ, Grandpa Vorobiov shared a few memories of growing up in Japan with me. It was a super special moment. I again broke my gluten free rule and had some amazing, made from scratch banana cake. As soon as I get the recipe I'll post it. It was delicious and I didn't mind breaking the gluten free for something so good!!

I also ended up watching three movies: 

Dolphin Tale- Cute movie; great for kids! And I'm about as emotional about dolphins and whales as Kristen Bell feels about sloths (here.)

Safe House- Ryan Reynolds= HOT!!! And Denzel Washington is just an amazing actor. Great date movie your guy would appreciate.

The Vow- Went and had a girls night with one of the people in my life I can not live without, Helene. Umm, all I can say is we had tears either in our eyes or streaming down our faces most of the movie. Channing Tatum and Rachel McAdams have incredible chemistry. I think the guys that appreciated The Notebook, would also appreciate The Vow.


To Die for Broiled Red Potatoes

And I say they are to die for, not just because I could make an entire meal out of them myself, but because any one that's ever had my broiled potatoes are in love with them.

The secret? Good olive oil, and some hot paprika. Yes, hot, Hungarian paprika; not the regular, sweet paprika that most people know.

I cheated and bought one of those pre-packaged bags of red potatoes from a major grocery store that are already cleaned and technically ready to steam in the microwave. I just don't steam them in the microwave.

Cut the potatoes into quarters, so they are even sized. Some you may even need to cut into 8ths. Pour about 3 tablespoons of (preferably) Greek extra virgin olive oil, safflower oil, or whatever oil you use, works as well, into a Pyrex dish. Put the potatoes in the Pyrex dish, salt with 2 pinches of sea salt, a liberal dashing of hot paprika, and if you have it, a dash of herbs de Provence. (I'll tell you more about that yummy combination of herbs later this week.)


Take your hand, or a fork, and make sure the potatoes are nicely coated in all the seasonings and the oil. Stick them in the broiler for 15 minutes, take a fork and re-coat them, and then broil them for another 10 to 15 minutes until fork tender.

Use as much or as little hot paprika as you'd like. It's all up to your taste, a little kick is the secret to these yummy potatoes.

To Die for Broiled Red Potatoes
Not in exact measurements
Ingredients:
.5LBS bag of red potatoes
3 TBS extra virgin olive oil, or safflower oil
3 to 4 shakes of hot Hungarian paprika
2 pinches of coarse ground sea salt
1 to 2 shakes Herbs de Provence (optional)


Directions:
1. Start broiler set to high. Pour 3TBS of oil into glass Pyrex dish.
2. Cut potatoes into quarters (larger potatoes may need to be cut into 8ths)
3. Put potatoes into glass dish. Season with sea salt, paprika and herbs de Provence (optional)
4. Make sure potatoes are well coated in oil and seasoning.
5. Broil for 15 minutes, use fork to move potatoes around and re-coat them with remaining oil in dish. Broil for another 10 to 15 minutes until potatoes are fork tender.
Enjoy!

Saturday, February 18, 2012

Just been one of those days...

I've been trying to write a post about the whole chicken I cooked in the dutch oven for Valentine's day, but I can't seem to finish it. I'm trying to make it as clear as possible because I didn't use a recipe. As hard as I tried to take measurements, and most importantly, keep time, time kind of slipped by me. I'll try and have it finished to the best of my ability soon. It'll just be one of those things I'll have to update/ re-write when I make it again. When it comes to baking I use recipes; you have to use recipes. When cooking, I do everything my look, smell, taste, and...my gut. That last part is hard to get down on paper. Ha!

In other, non-kitchen related news:
We finally finished painting the living room. It's a gorgeous grey called "polished silver" by Valspar; color matched to Olympics non-VOC paint.

We ended up going for a satin instead of an eggshell or flat, because I like a little bit of a sheen to it to give it some depth, and it helped balance out the gloss of all our trim, window borders and wainscoting. However, I wish I had done a tad more research and realized it's really hard to paint with anything but flat paint, because if you're not super careful you'll be able to see the brush marks in certain light and angles. It's not so bad lighting wise in the room; the natural light doesn't really pick it up, nor do our floor lamps. Hopefully no one else will notice??
Here is a picture in-process of painting where you can still see some wet paint, taken with an iPhone, with a large florescent light, lighting up the room. So I promise it looks 100% better then this now:
I have pictures taken with the DSLR, which I'll post with  my next weekend project.


We also picked up some of this:

Yup. Wood. It's for our newest project, a bookcase!
Along that wall I showed you above, we did have an Ikea original in a medium brown. The plan was to maybe pick up a couple more and line the wall, but honestly I hated that book shelf. It's now sitting in my office/ catch-all room.

Instead that long wall will be host to a built in pipe bookshelf! We'll be staining the wood instead of painting it, to bring in some character into the home, and I think the piping will add a nice effect as well as keep things a little lighter feeling then an enclosed book case. Check back for progress and for the final thing! I'll try to document it all!

This post ran long, and wordy. Forgive me, and kudos to you if you're actually still reading. Have a wonderful weekend! I'll be back with recipes on Monday.

Wednesday, February 15, 2012

Red Velvet Super Fudgy Brownies

Here's a bit of a spin on the "Only Brownie Recipe You Will Ever Need."
For Valentine's Day I decided to put a bit of a spin on them; Red Velvet!


I feel like I should take this time to apologize for all my iPhone pictures. I do have a nicer camera, but it's much easier to pick up the phone, edit the pictures, and have them imported directly onto the laptop via iCloud....

I made two changes to the recipe:
1. I used two eggs instead of four in order to make a the brownies more...fudgy. Huge hit, of course.
2. I used 1TBS of Red Velvet Bakery Emulsion.

If you don't have Red Velvet Emulsion, you can just go ahead and add 1TBS (or more) of red food coloring. However, this does not make it truly Red Velvet. Contrary to popular believe, Red Velvet isn't just chocolate with red food coloring. Traditional Red Velvet cakes (and brownies) usually have vinegar and/or buttermilk in their recipes. This emulsion not only gives you the color of Red Velvet, but also the flavor. *For a stronger Red Velvet flavor, us 2 TBS.

I bought mine from a Mennonite market in the Shenandoah Valley, were I also bought an insane amount of really great quality King Arthur's flour for next to nothing.


Red Velvet Fudge Brownies (without the frosting)
Variation of this brownie recipe


Ingredients:
1 cup (2 sticks) butter or margarine
2 cups sugar
2 teaspoons Madagascar Pure Vanilla Extract (Or home made)
2 eggs
3/4 cup Rademaker Dutch Processed Cocoa (or 1/4 cup regular cocoa powder and 1/2 cup of dark cocoa powder)
1 cup all-purpose flour
1/2 teaspoon baking powder
1/4 teaspoon sea salt
1 to 2 tablespoons Red Velvet Bakery Emulsion

Directions:
1. Heat oven to 350°F. Grease 13x9x2-inch baking pan.
2. Place butter in large microwave-safe bowl. Microwave at 50% power, 2 to 2-1/2 minutes or until melted. Stir in sugar and vanilla. Add eggs, one at a time, beating well with spoon after each addition. Add salt. Add cocoa; beat until well blended. Add flour and baking powder; mix well. Add Red Velvet Bakery Emulsion; MIX WELL. Pour batter into prepared pan.
3. Bake 30 to 35 minutes or until brownies begin to pull away from sides of pan. Cool completely in pan on wire rack. Cut into bars. About 36 brownies.